How to Upload Files to the Media Manager
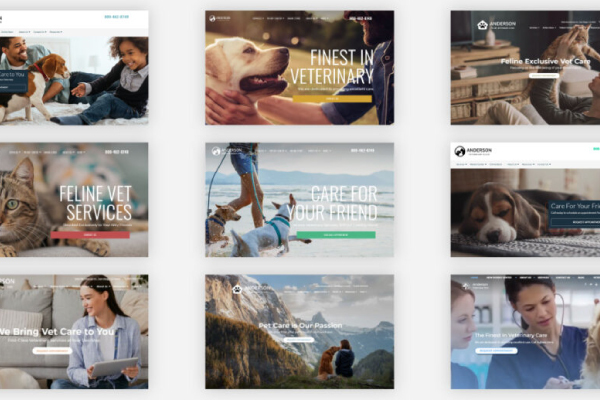
One of the best ways to showcase your practice is by the visuals you use on your website. Updated images and video can highlight your specialties and set you apart from your competitors. To accomplish this, you first need to know how to change and update the visuals on your site.
For our clients, adding images is as easy as 1-2-3!
With our user-friendly Portal platform, clients can upload the media files they need and add them to any section on their website. However, if you have limited time on your hands, any image updates can be made by simply reaching out to our client support team online or by phone.
Interested in adding images and video to your website yourself? Here’s how:
How to Upload to the Media Manager
When you log into the Portal platform, you will immediately be taken to your dashboard. On the dashboard, you will see a leads overview. On the left-hand side of the screen, you will find the navigation menu.
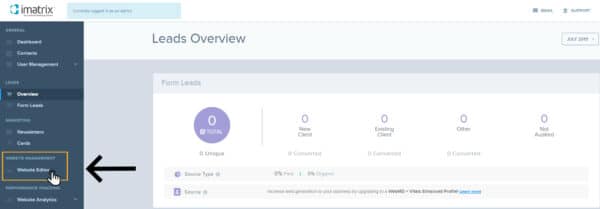
Under Website Management, locate a tab called “Website Editor”. Click on Website Editor and you will be directed to the Website Management page where you’ll see a blue “Edit Website” button. Click on this button to begin editing your website.

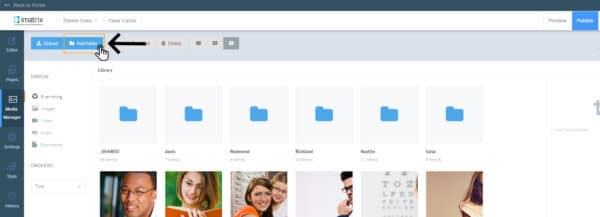
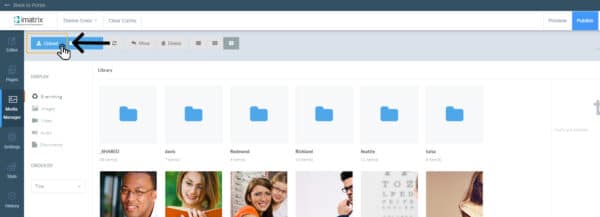
1. Click on “Media Manager”
After you’ve gone into the Website Editor, look on the left-hand side of the screen for the navigation menu. Find Media Manager and click on the photo icon.

In Media Manager, you will find your Media Library where any files that have been uploaded will be housed. Your Media Library makes it easy to store all of your media files in one location so you don’t have to search on your computer every time you need these assets. To organize and store your media files, you can create different folders based on the pages those files reside on or the content they contain.
Adjust your view with different options depending on your preference. You can see big thumbnails vs. list view in the top of the page navigation bar.
2. Organize Your Media Files
When uploading media files, you can choose which folder you want to store the image or file in by opening that folder prior to uploading. This will help you keep track of the images you are using on each page and the types of files organized in your library.
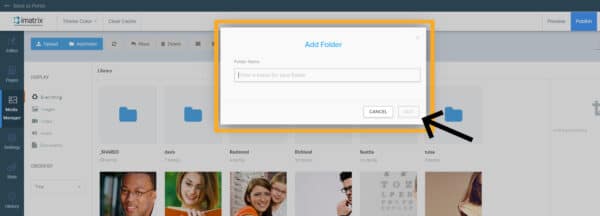
Don’t see the folder you want to use? Create one!
To create a new folder, click on the blue “Add Folder” button. When the pop-up box comes up, type in the folder name and click “Add.” Your new folder is now ready to open and store files.
3. Click on “Upload”
When you are ready to upload a file, click on the blue “Upload” button to the left of the top navigation bar. Upload the photo or video from your computer and insert it where you’d like it to go. You can also drag and drop to resize and change the photo. When adding an image in text sections, use the “Upload Media” button.
If you would like to choose a folder to upload the file to instead, double click on the folder in the Media Manager. Once the folder is open, then click on the “Upload” button on the top left-hand side.
That’s it! You are set and your photos are nice and organized right where you need them. The next time you need to use a photo or replace an image on a page, you’ll know where to go!
Uploading Videos
If you wish to house your videos on Portal, please note that video files have to be under 10kb. This works great for short, simple videos. If you have longer videos, there are other options you can utilize.
We recommend using another platform to host the video and embed the video onto your site with an embed code. You can host your videos on social media platforms like Facebook or YouTube and use their embed code or you can employ a service like Wistia that houses your videos for you.
The difference between using a social media platform and a service like Wistia is that your website will receive all of the traffic and SEO from that video. Embedding videos that are housed on social media will feed into the traffic to your social pages.
Deleting Images
If you have an image you want to remove, don’t delete it in Media Manager just yet. Go to the page your image is on and delete it from the page first, then go into Media Manager and delete the image. But once you delete an image from Media Manager, it is gone forever. It cannot be retrieved.
Don’t worry about the space images are taking up on your site. You can keep as many images in your Media Manager as you need.
Interested in learning more about optimizing your website with images?
These articles should help!
The Power of Images in Video
7 Ways to Improve Your Website’s User Experience
How to Tell a Story Through Content Marketing